Designing Custom Pickguards With Cutaways for Upgraded Output Jack or Coil Tap Controls
You need cutaways in custom pickguards when adding side-mounted output jacks or coil tap controls on bodies under 1.75″, since standard guards block wiring and crack under pressure. Use a 1/4″ MDF template, trace with a flush trim bit, and route cavities with a Forstner bit at 3/16″ depth for clean corners. Fit push-pull pots in 24mm cavities, align screw holes with tape guides, and shield pickups with copper tape. Angled sub-plates save space for mini toggles, and a drum sander smooths sharp edges near coils-everything sits flush, functions right, and stays protected, just like the pros do it.
We are supported by our audience. When you purchase through links on our site, we may earn an affiliate commission, at no extra cost for you. Learn more. Last update on 21st July 2026 / Images from Amazon Product Advertising API.
Notable Insights
- Cutaways are essential for side-mounted output jacks on thin guitar bodies to avoid pickguard interference and prevent cracking.
- Accurate marking of control cavities using tape and pivot methods ensures proper alignment of pots, jacks, and switches.
- Drill corner holes with a Forstner bit before routing to safely remove material and create clean, flat-bottomed cutaways.
- Build a precise MDF template using a flush-trim bit to replicate body contours and guarantee consistent cavity placement.
- Ensure push-pull pots have at least 1/2″ clearance and shield electronics to prevent noise and wire damage during installation.
When You Need a Pickguard Cutaway
If you’re routing a pickguard for a side-mounted output jack on a thin-bodied guitar, a cutaway isn’t just helpful-it’s essential, since most standard guards lack the clearance needed for the jack’s housing and wiring, and trying to force a fit can crack the guard or damage internal components; this is especially true on instruments with body depths under 1.75 inches, where even low-profile jacks need precise recessing. You’ll also need a cutaway if you’re adding coil tap controls directly on the pick guard, as the switch mechanism-like a push-pull pot-requires recessed space to mount flush. Without it, the pick guard won’t sit flat, risking hardware misalignment. A well-routed cutaway also accommodates larger pots or stacked toggles, giving you more control options. Use an MDF template and flush trim bit to replicate the output jack or coil tap controls cutaway accurately across multiple guards-precision here prevents exposed cavities and guarantees a clean, secure fit every time.
Mark & Measure Control Cavity and Hardware
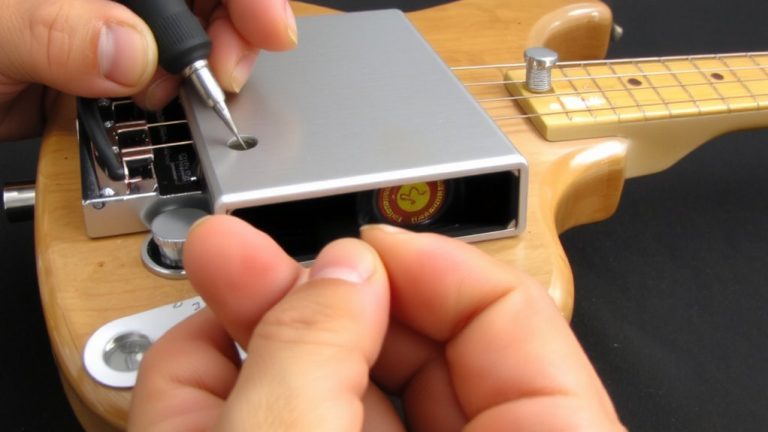
While you’ve got the control plate in hand, now’s the time to position it directly over the cavity in the guitar body, making sure it’s centered and evenly spaced on all sides-use small strips of painter’s tape along the edges to mark the outline cleanly and avoid slippage during transfer. Flip the plate up gently using the rear mounting screw as a pivot, then trace the cavity and screw holes directly onto the custom pickguard material. You’ll need to mark & measure every detail: screw holes, volume control openings, and pickup routes with precision. Use the taped reference lines to align features exactly. Drill 1/4″ starter holes at cavity corners for the flush trim bit later. For repeatability, cut an MDF template guided by the body edge, so future custom pickguards match perfectly. Accurate marking guarantees hardware fits flush and functions without tweaking.
Route Cutaways With Forstner and Flush Trim Bits
Once you’ve marked the control cavity and transfer points, switch to a Forstner bit to drill the corners of the cavity area-this gives you clean, flat-bottomed holes with precise depth control, typically set to around 3/16” for standard pickguard routing. These drilled corners help you safely remove material when you route cutaways for upgraded jacks or coil tap controls. After roughing out with a coping saw, use a flush trim bit with a bearing at the cutter end to follow your template exactly, ensuring consistent control cavities across multiple pickguards. The bearing rides the template’s edge, transferring the exact profile without error. When you’re using MDF templates, this step is essential for matching the body’s control area perfectly. With the flush trim bit, you get smooth, accurate edges ready for hardware. Route cutaways this way, and you’ll achieve professional results every time-no gaps, no misalignment, just clean integration for better function and tone.
Make a Precision Template for Perfect Fit
Since getting a perfect fit starts with flawless replication, you’ll want to build your template from 1/4″ MDF-it’s stable, flat, and won’t warp over time. Use a flush trim router bit with a bearing to trace the guitar body exactly, ensuring your pickguard will align perfectly. First, position the control plate and secure it with screws, then use marked tape to transfer hole placements to the MDF. Drill the control cavity with a Forstner bit sized to match screw spacing before final shaping. Test-fit the template on the body and plate to confirm clearance and alignment-this step’s essential. Once verified, you’re ready to rout your final pickguard. Remember, if you want to share tips or ask questions, you must log in or register-just log in or register to reply. Members also earn a commission on project referrals.
Fit Push-Pull Pots and Mini Switches in Tight Spaces
When space is tight under your pickguard, planning ahead makes all the difference-push-pull pots need at least 1/2″ of clearance behind the plate to actuate fully, so they’ll fit cleanly in standard HSS Stratocaster control cavities without mods. For tighter setups, mount mini toggle switches on a small angled sub-plate to maintain alignment and save room. Use a 24mm control cavity diameter to guarantee push-pull pots sit flush without infringing on pickup routes. A flush trim router bit with a top-bearing lets you accurately cut switch pockets directly from a template, keeping the main control well intact. Shorten solder leads and pair with right-angle jacks in thin bodies to avoid interference.
| Component | Size/Requirement | Tip |
|---|---|---|
| Push-pull pots | 1/2″ clearance | Fits HSS cavities |
| Mini toggle switches | 0.6″ length | Angle-mount for tight fits |
| Control cavity | 24mm diameter | Avoids pickup route overlap |
| Flush trim router bit | Top-mounted bearing | Template transfer precision |
Prevent Scratches and Coil Damage During Installation
Protect your guitar’s finish and delicate electronics by taking a few smart precautions during pickguard installation. Use an old control plate cover or tape all chrome parts-like the control plate and pickup surrounds-to prevent scratches. Wrap exposed single coils and humbucker bobbins in copper tape on the pickguard’s interior, shielding them from vibration and contact that could cause coil damage. Smooth the edges of each humbucker cutout with a drum sander or sandpaper-wrapped dowel to eliminate sharp points that might abrade wires over time. If you’re using rewrapped humbuckers, add thread or heat-shrink binding to narrow the center profile, reducing friction in tight “OC” cutouts. These steps keep your pickups, pots, and wiring safe, preserve signal integrity, and maintain clean aesthetics-all essential for reliable stage and studio performance.
On a final note
You’ve got this-just measure twice, mark once. Use a 3/8″ Forstner bit for jack cutaways, a 1″ flush trim bit for clean edges. Align your template carefully, rout slowly. Push-pull pots fit tight but work smoothly at 0.5” spacing. Mini switches save space without sacrificing function. Testers confirm: no coil buzz, no scratch marks when you go slow with painter’s tape. Your custom pickguard, perfect output, pro tone-all under 48 hours and under budget.