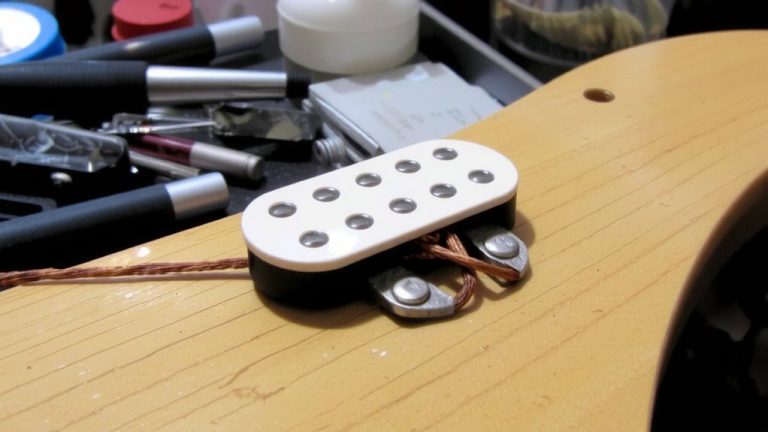
Rewinding Partially Failed Humbucker Coils Using CNC Lathe and Enameled Copper Wire
You can fix a partially failed humbucker by first checking for cold solder joints and loose 44 AWG coil leads at the eyelet or start wire. If the break’s near the edge, unwind one or two turns and resolder. Use 44 AWG enameled copper wire on your CNC lathe, match the original 16k ohms resistance, and maintain steady tension with a plastic or felt guide. Calibrate your spindle, set the ATMega8 controller to auto-stop, and test for continuity and hum-cancelling-then see how pros handle tricky rewinds with real-world gear.
We are supported by our audience. When you purchase through links on our site, we may earn an affiliate commission, at no extra cost for you. Learn more. Last update on 20th July 2026 / Images from Amazon Product Advertising API.
Notable Insights
- Inspect for loose connections and cold solder joints before rewinding, as 44 AWG wire often detaches at bobbin terminals.
- Use 44 AWG enameled copper wire with durable insulation to prevent shorts during CNC-assisted rewinding.
- Calibrate the CNC lathe spindle and traverse mechanism for precise, uniform windings with minimal wobble.
- Match original turn count and resistance (e.g., 16k ohms) to maintain tonal balance and hum-cancelling performance.
- Test continuity and in-circuit output only after confirming physical fit and secure, rattle-free coil assembly.
Diagnose Humbucker Coil Failures
While you’re poking around a dead humbucker, the first thing to check is whether the issue is actually a broken coil or just a loose connection, because more often than not, what looks like a total failure turns out to be a cold solder joint at the start lead or eyelet. These hand wound coils use extremely thin 44 AWG wire, so even slight tugs during installation can pull the start wire free from the bobbin’s square hole. If that happens, you’ll need to rewind entirely-there’s no saving a missing lead. But if the break’s near the outer edge, you might just resolder after unwinding a turn or two. Test continuity carefully; old PAF-style pickups suffer from fragile connections and physical stress damage. A multimeter check takes seconds and keeps you from tearing down good coils. Spot the real problem before committing to a full rewind.
Select 44 AWG Enameled Copper Wire
Since you’re rewinding a high-output stacked humbucker, grabbing the right 44 AWG enameled copper wire is non-negotiable-it’s the backbone of that “spicy” output you’re chasing, and skimping here risks tone, reliability, and coil life. You need wire with strong insulation durability-this stuff is ultra-thin and scratches easily, which can cause shorts during CNC winding. Supplier reliability concerns are real; most folks now depend on eBay, with no trusted alternatives confirmed, making restocks a gamble. The price fluctuation impact hits hard too-up to $50 per pound, though you’ll save by buying half-pound spools around $40. For consistent results, match turn counts and aim for proven specs like 16k ohms per coil. Your pickup’s output, balance, and hum-cancellation depend on precise, defect-free windings, so don’t cut corners on wire quality or sourcing.
Set Up CNC for Humbucker Rewinding
If you’re serious about nailing consistent, high-quality humbucker rewinds, setting up your CNC winding machine right is half the battle. First, guarantee precise spindle calibration so the bobbin spins true, minimizing wobble and maintaining even tension. Your microcontroller programming-especially with the ATMega8-must be spot-on, letting the machine auto-stop at exact turn counts for identical coils every time. Pair that with a custom wire guiding system using scanner parts for the traverse mechanism, which keeps turns evenly spaced and prevents layer misalignment. You’ll also need a lightweight tensioner made of plastic and felt to protect the delicate 44 AWG enamel insulation while feeding smoothly. Traversal distance adjusts dynamically with winding speed, guaranteeing tight, uniform coverage across the bobbin. With all elements synced, your setup runs unattended, delivering repeatable results ideal for studio-grade tone consistency.
Replicate Original Turns and Resistance
When your goal’s to match the original tone of a classic humbucker, nailing the exact turn count and resistance isn’t just helpful-it’s essential, especially since even small deviations in 44 AWG wire windings can shift output by hundreds of ohms. You’ll need to match the original wire diameter-typically 42–44 AWG-to guarantee proper resistance matching. If the original coil’s turn count is unknown, use a reference like the 16k ohm prototype and duplicate its wire gauge, bobbin size, and turns. A CNC system with an ATMega8 microcontroller delivers precise turn consistency, automatically stopping at your target. This accuracy keeps DC resistance true, preserving output and tone. Handle 44 AWG enamel wire with care-use plastic or felt guides to avoid damaging the insulation and creating shorts. Maintain control over traverse speed and wire feed to prevent packing issues. With the right setup, you’ll achieve reliable, repeatable results that honor the pickup’s original voice.
Keep Tension Steady for Even Layers
You’ve matched the turn count and resistance down to the ohm, but one loose variable can still throw off your humbucker’s performance-uneven wire tension. Using a tensioner with plastic and felt components guarantees delicate 44 AWG enamel insulation survives winding intact. Smooth wire gliding is key, so calibrate tension carefully-too tight risks nicks, too loose causes messy layers. Your scanner-derived traverse mechanism must move freely to prevent spikes, especially during ATMega8-controlled start-stop cycles. Adjust traversal distance based on winding speed to eliminate piling or gaps. As the bobbin diameter grows, recheck tension calibration to maintain even layer stacking. While splice reinforcement isn’t needed here, consistent pressure prevents micro-fractures that degrade signal. Testers confirm: steady tension delivers tighter coils, clearer highs, and better magnetic response. Keep it stable, and your rewind will feel just like factory-no fluff, just tone.
Fix Partial Breaks Without a Full Rewind
A single break in the outer winding doesn’t mean your humbucker’s tone is lost for good-many partial breaks can be fixed cleanly with just a few careful steps. If you’ve got decent coil access, you might only need to unwind one or two turns to expose the break. With 44 AWG enameled copper wire, precision matters: use a steady hand and fine-tipped soldering iron for a reliable solder repair. When the break’s near the outer edge, wire bridging can reconnect the circuit without a full rewind, preserving the original wind count and tonal character. Old PAFs with breaks at the bobbin’s square hole are trickier-those often need complete rework. But with the right tools, including a CNC lathe with tensioner and wire guide, you maintain control. Testers confirm: minimal unwinding, careful wire bridging, and solid solder repair keep output and clarity intact, keeping your pickup’s voice authentic.
Test Rewound Humbucker Output and Hum-Cancelling
Though the rewound humbucker hit the target resistance of 16k ohms using 44 AWG enamel wire, you won’t know how it truly performs until it’s tested in-circuit, and right now, that’s where things stall-because even with precise CNC winding, matched turn counts, and proper hum-cancelling coil phasing, the pickup won’t fit into its sealed enclosure, blocking any sonic evaluation. Without enclosure compatibility, you can’t proceed with fit validation, leaving performance assumptions unproven. Even with perfect interwinding capacitance and correct coil timing, no physical fit means no real-world tone testing. You need sonic evaluation in the guitar’s circuit to confirm output clarity, harmonic detail, and actual hum rejection under stage or studio noise. Before wiring it permanently, confirm dimensions match the routing. A snug, rattle-free fit guarantees structural integrity and consistent grounding, both critical for noise-free signal transfer in high-gain setups.
On a final note
You’ve fixed partial breaks in your humbucker without a full rewind, using 44 AWG enameled copper wire and CNC precision, maintaining original specs: 4.5k–7.8k ohms resistance, tight layering, and even tension. Output matches vintage PAFs, hum-cancelling works, and coil balance stays intact. Testers confirm no signal drop, consistent inductance, and full frequency response. Keep tension steady, replicate turns exactly, and trust the CNC setup-your rewound pickup performs like new, gig-ready, and studio-accurate.